Archiving Data from Synology to AWS S3 Glacier
Table of Contents
Prerequisites⌗
- AWS Account with administrative access
- Synology NAS with DSM 6.0 or later
- Network connectivity between your Synology NAS and the internet
Cost Warning: AWS S3 Glacier Deep Archive has very low storage costs but high retrieval costs. Data retrieval can take 12+ hours and costs vary based on retrieval speed. This solution is intended for long-term archival of data you rarely need to access.
Create S3 Bucket⌗
This is where the archive data will be stored.
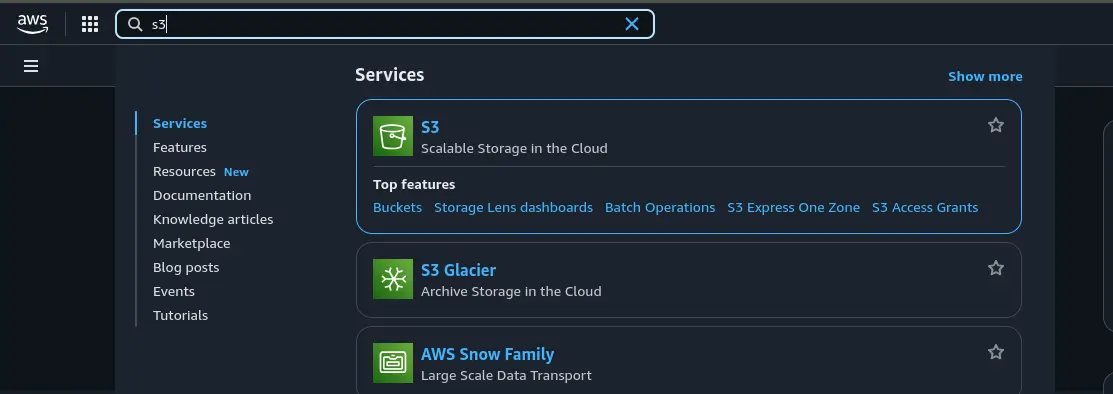
Step 1: Navigate to S3 Console⌗
Go to the AWS Console.
Use the search box at the top center of the page to find the S3 service.
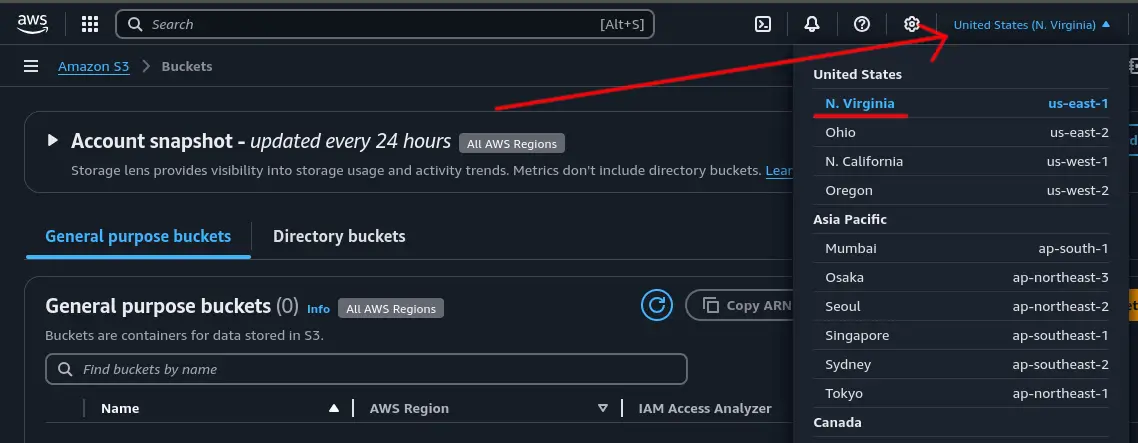
Step 2: Create New S3 Bucket⌗
Before creating the bucket, make sure the AWS region is set to one that is close by so the bucket is created in that region. Closer the region the faster the data can get there.
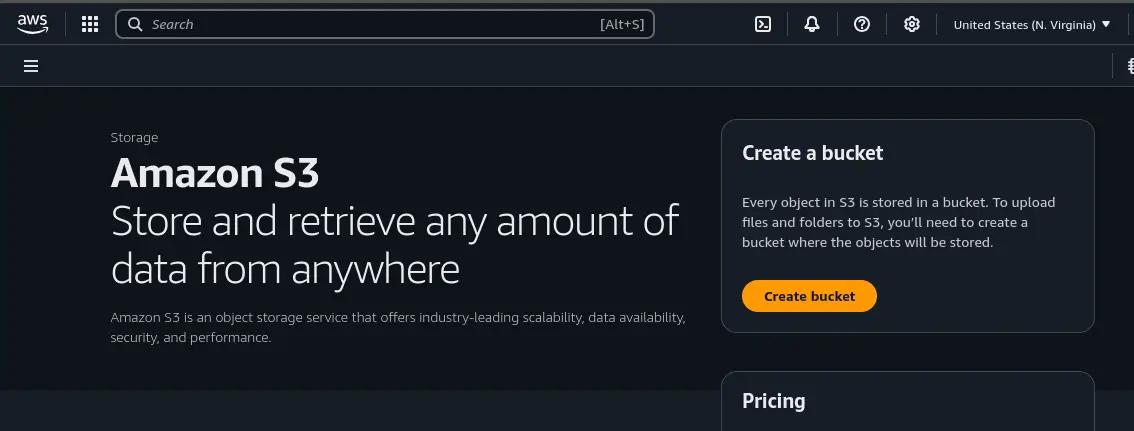
Click the “Create bucket” button to create a new bucket to store your data.
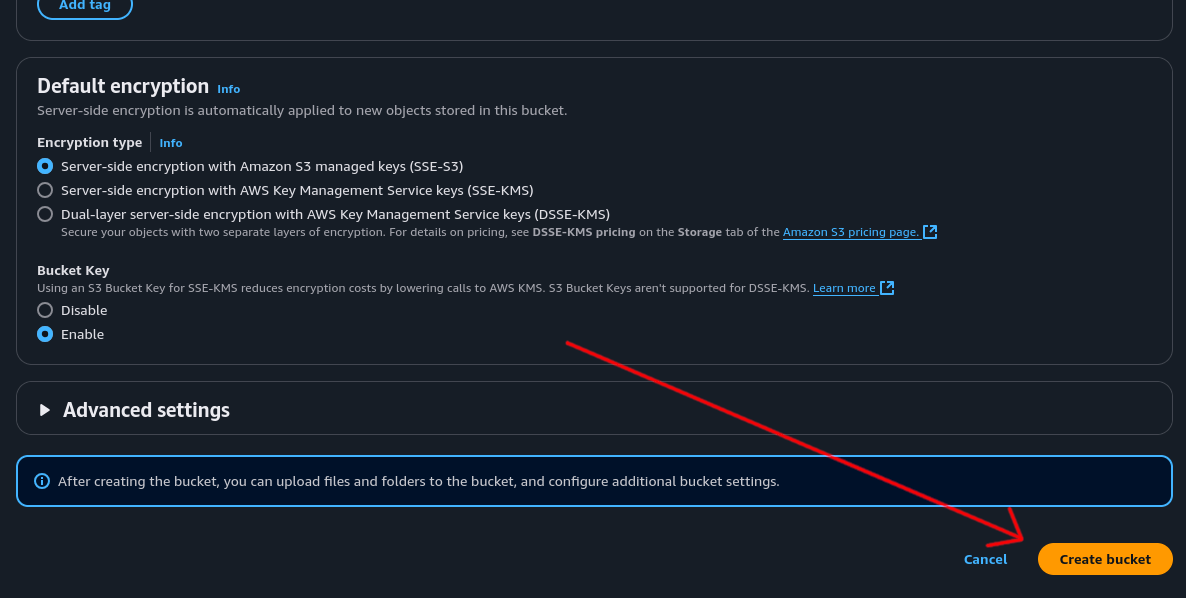
Step 3: Configure Bucket Settings⌗
Give your bucket a unique name.
Note: S3 bucket names are globally unique across all AWS regions and accounts. No two S3 buckets anywhere in the world can have the same name.
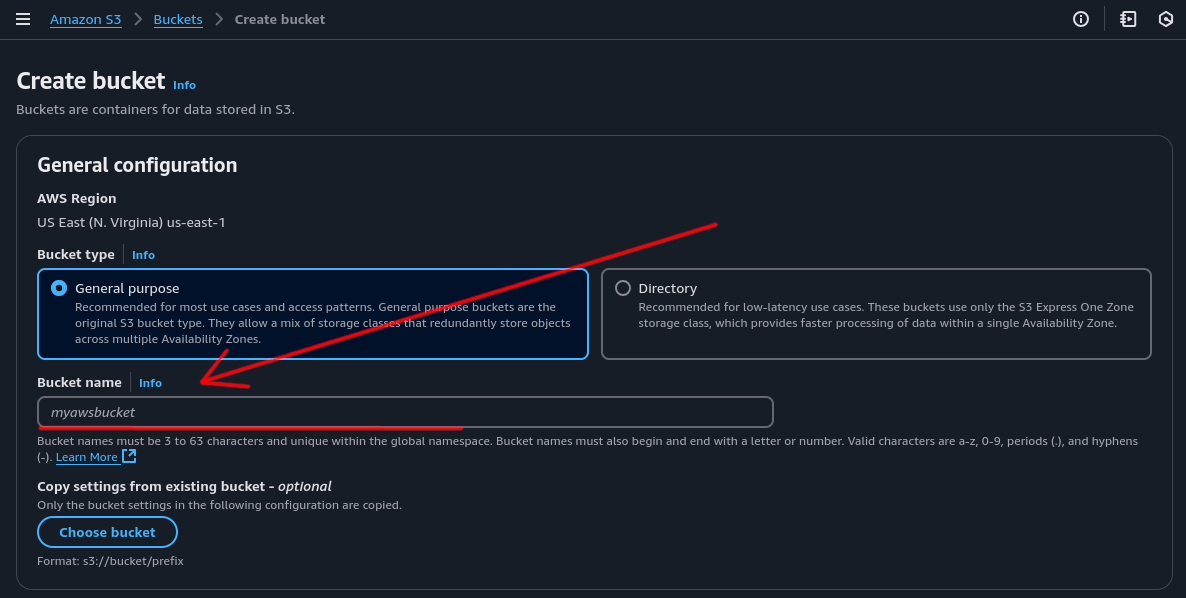
In this example, all other options can remain as default.
Step 4: Create the Bucket⌗
Click “Create Bucket” at the bottom of the page.
Create S3 Lifecycle Rules⌗
Lifecycle rules automatically move your data from S3 Standard to S3 Glacier Deep Archive, making storage costs cheaper for long-term archival.
Step 1: Access Bucket Management⌗
Click on your newly created bucket.

Step 2: Create Lifecycle Rule⌗
- Click the “Management” tab
- Click “Create lifecycle rule”

Step 3: Configure Rule Scope⌗
- Give the rule a descriptive name (e.g., “Archive to Deep Archive”)
- Under “Choose a rule scope”, select “Apply to all objects in the bucket”
- Tick “I acknowledge that this rule will apply to all objects in the bucket” to confirm you want this rule to move everything put into this bucket to Glacier Deep Archive

Step 4: Configure Lifecycle Actions⌗
- Tick “Transition current versions of objects between storage classes”
- Tick “I acknowledge that this lifecycle rule will incur a transition cost per request”

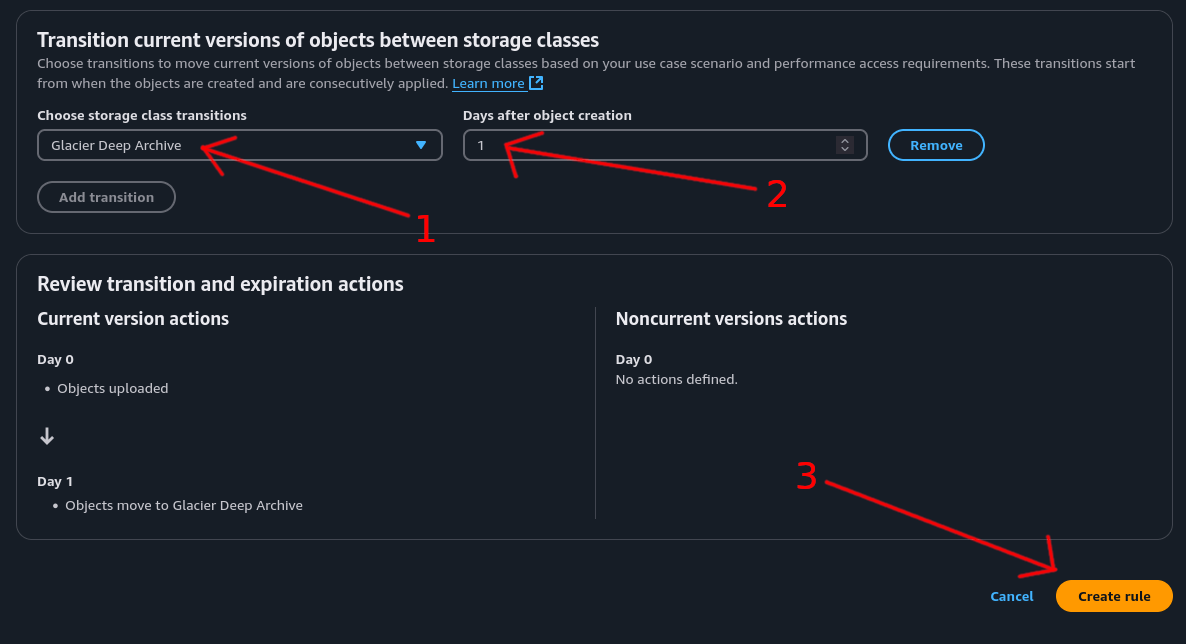
Step 5: Set Storage Class and Timing⌗
- For storage class, select “Glacier Deep Archive”
- Set the time to 1 day so the rule runs 1 day after object creation
- Click the “Create Rule” button to create the rule
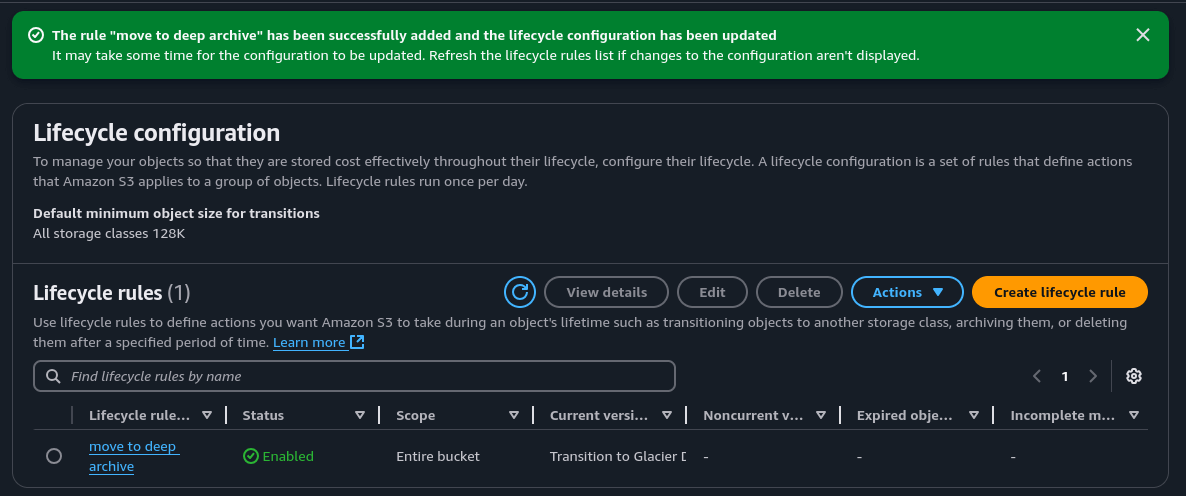
If successful, you should see your new rule listed.
Set Up IAM User and Access Key⌗
We need to create a dedicated user account that the Synology can use to access the S3 bucket securely.
Create IAM User⌗
Step 1: Navigate to IAM⌗
In the top search bar, type “IAM” and click on the IAM service.

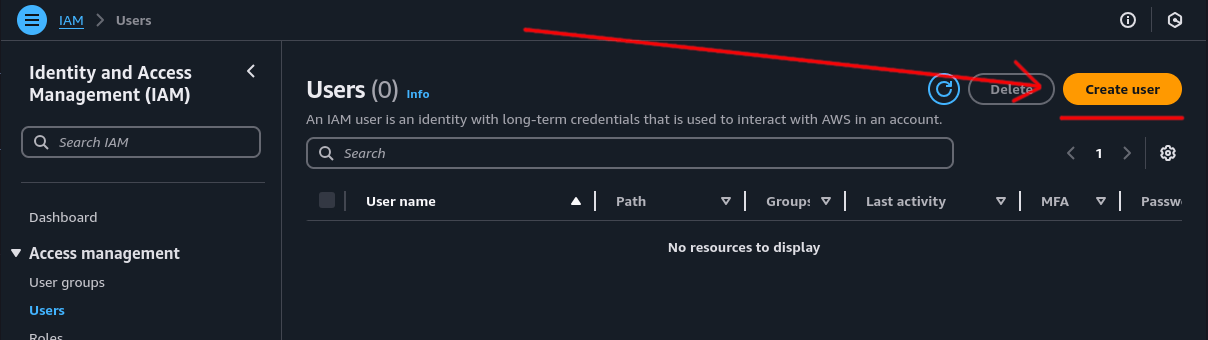
Step 2: Access Users Section⌗
Click on “Users” in the left sidebar.

Step 3: Create New User⌗
Click the “Create user” button.
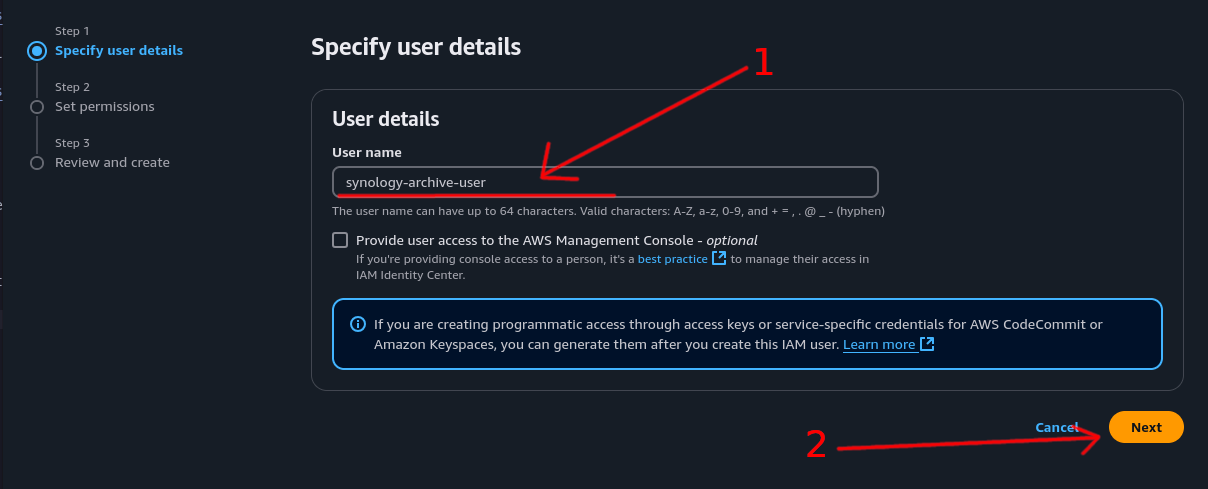
Step 4: Set User Details⌗
- Give the user a descriptive name (e.g., “synology-s3-archive”)
- Click “Next”
Create IAM Policy⌗
Create a custom IAM policy to restrict the user’s access to only the necessary S3 operations on your specific bucket.
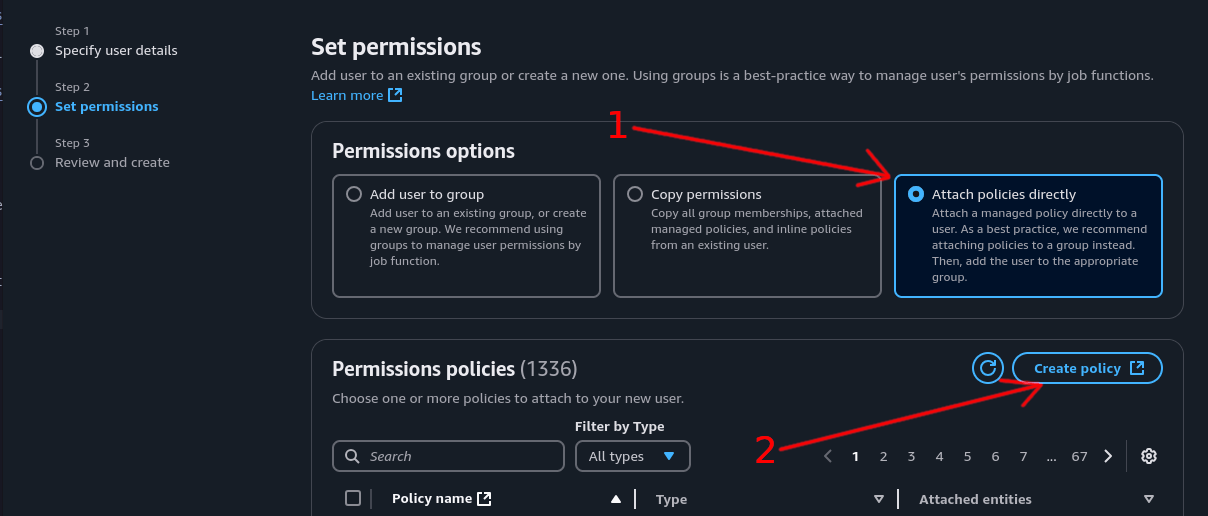
Step 1: Set Permission Method⌗
- Select “Attach policies directly”
- Click “Create policy”
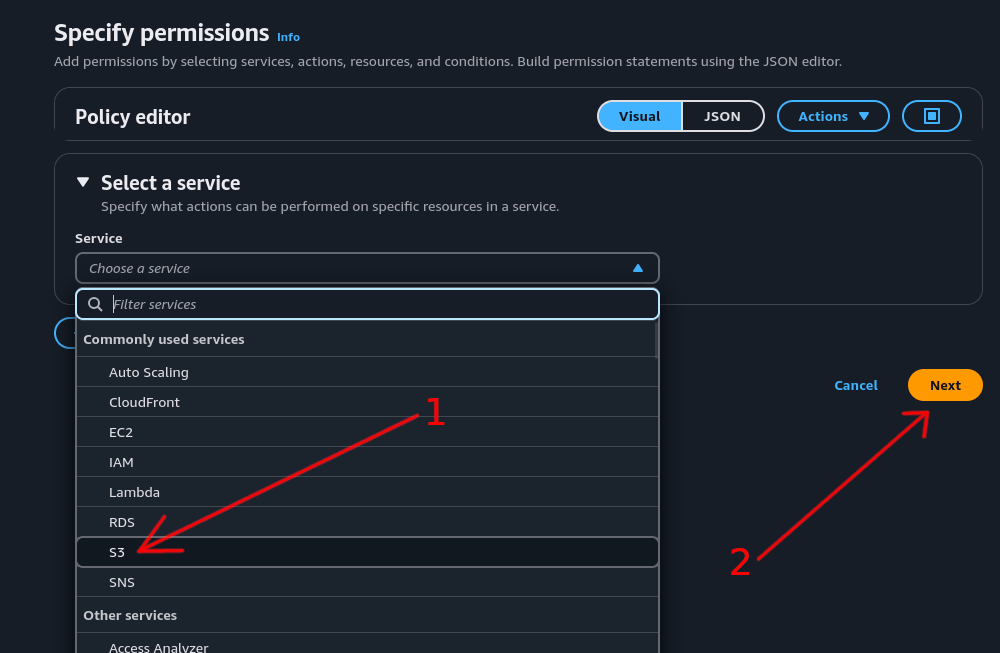
Step 2: Select Service⌗
- In the “Select a service” section, click the “Choose a service” dropdown menu and select “S3”
- Click “Next”
Step 3: Configure Permissions⌗
Here you have options for how much access to give the IAM user.
The simplest option is to check “All S3 actions (s3:*)” which will give the user full rights to the S3 bucket.
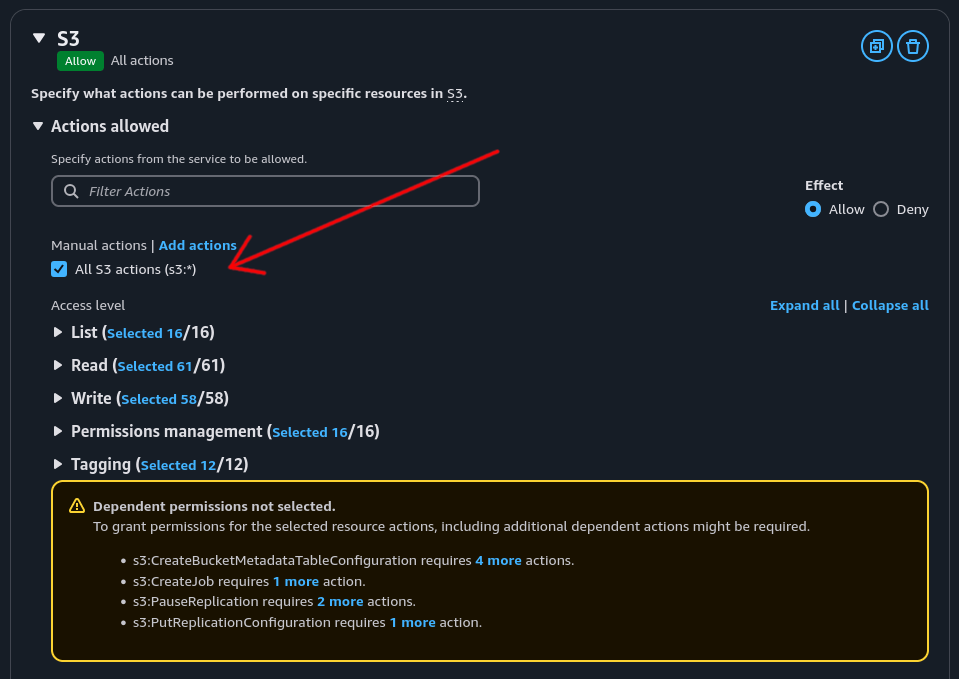
However, for archiving purposes, this level of access could result in accidental data loss if a file is deleted from the Synology, which could sync the deletion to the S3 bucket.
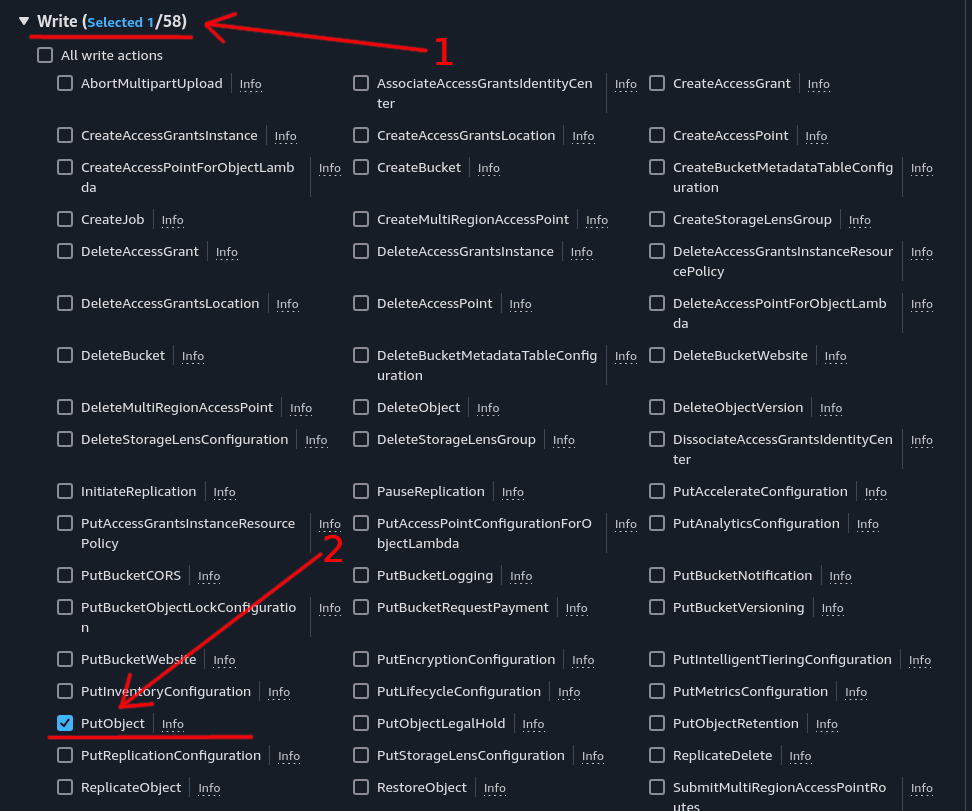
Recommended approach: To prevent accidental deletions, expand the “Write” section and check only the “PutObject” option.
This restricts the user from deleting files from the bucket while still allowing file uploads.
Note: This is not a perfect solution as the PutObject permission can allow files to be overwritten. Consider enabling S3 versioning to keep old versions of files and ensure no data can be lost.
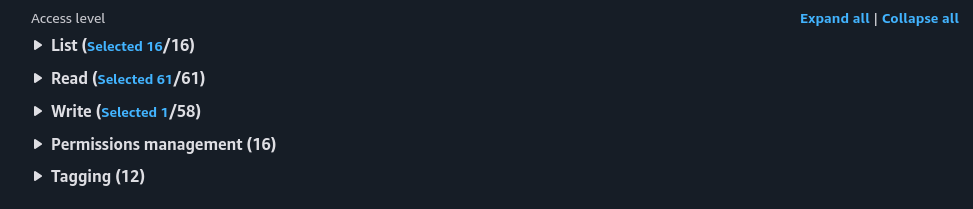
Select all “List” and “Read” checkboxes to give the user the ability to read data back from the bucket.
Once configured, the access level should look like this:
Step 4: Restrict Access to Specific Bucket⌗
Next, we need to restrict access to only your archive S3 bucket.
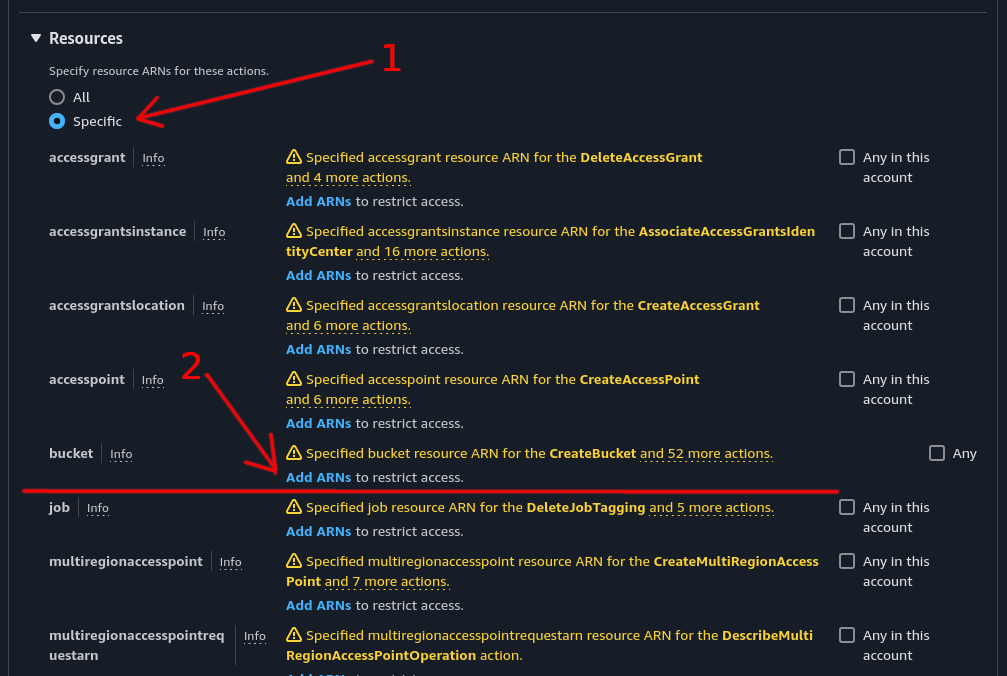
Scroll further down the page to the “Resources” section.
- Select “Specific”
- In the bucket section, click “Add ARN”
Step 5: Add Bucket ARN⌗
Enter the name of the S3 bucket you created earlier.
Then click “Add ARNs” to add the bucket to the allow list.

Step 6: Add Object-Level Permissions⌗
Click “Add ARNs” again and enter the bucket name with /* at the end.
Note: This wildcard path tells the policy to allow access to all objects within the bucket.
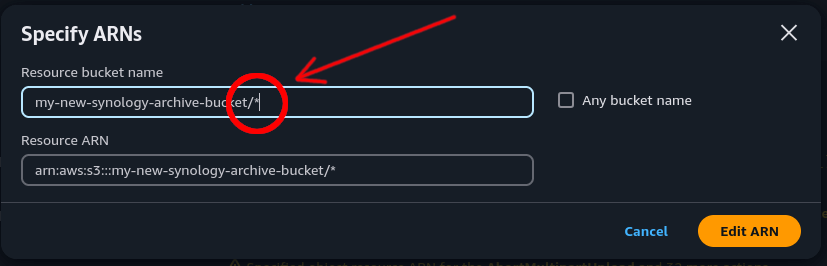
Once finished, it should look like this:
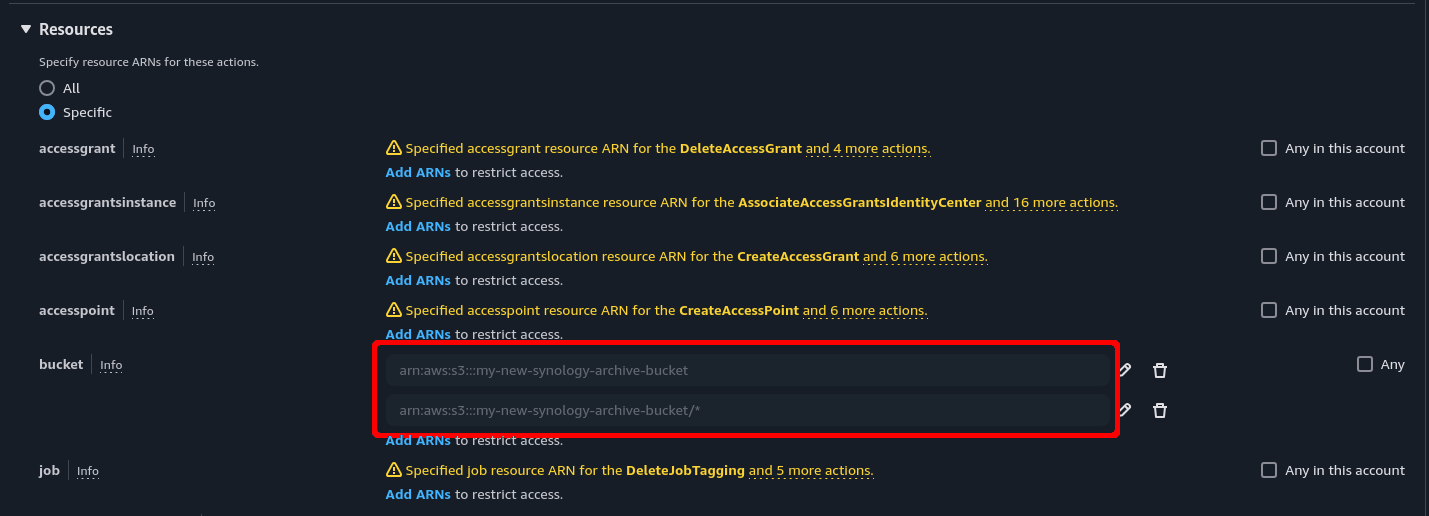
It’s important to add both paths because adding just the bucket name gives access to the bucket itself but not the objects (folders/files) within it. The additional bucket name with the /* path ensures the policy includes all files and folders.
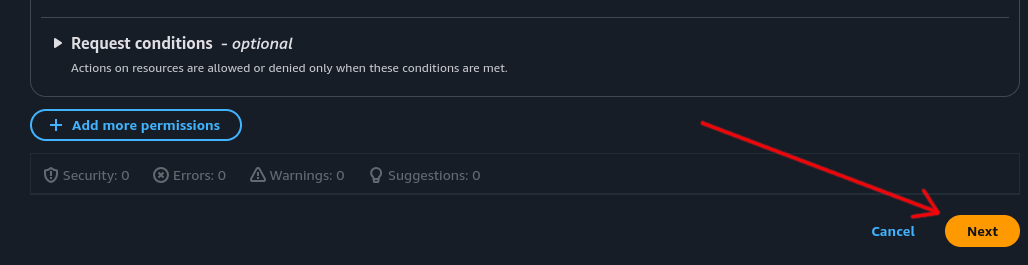
Step 7: Continue Policy Creation⌗
Once the bucket has been added to the resources section, scroll to the bottom of the page and click “Next”.
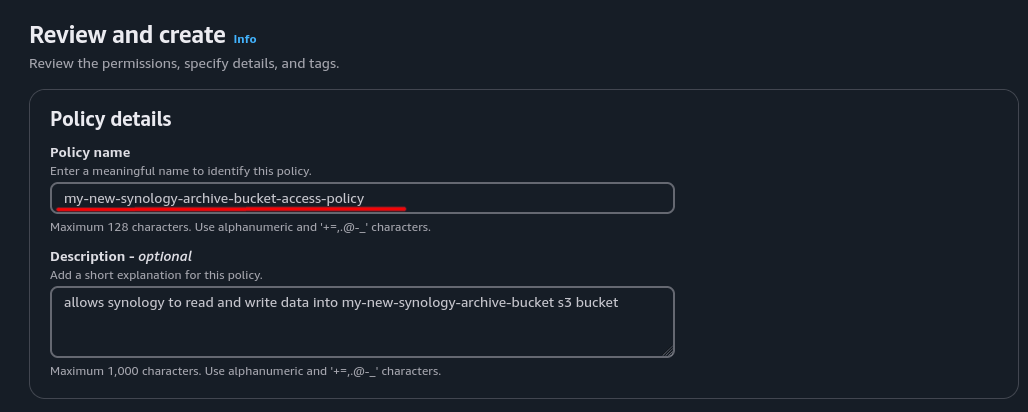
Step 8: Name the Policy⌗
Give the policy a descriptive name (e.g., “SynologyS3ArchivePolicy”). Optionally add a description to make it clear what the policy does.
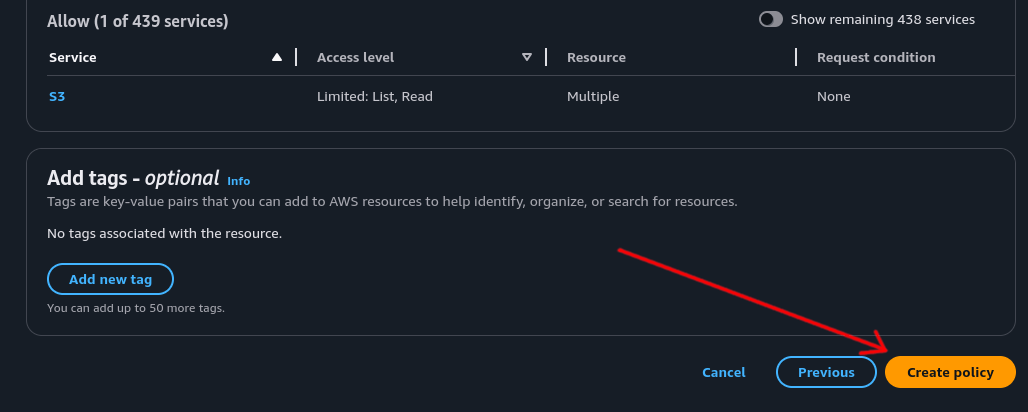
Step 9: Create Policy⌗
Scroll to the bottom of the page and click the “Create policy” button.
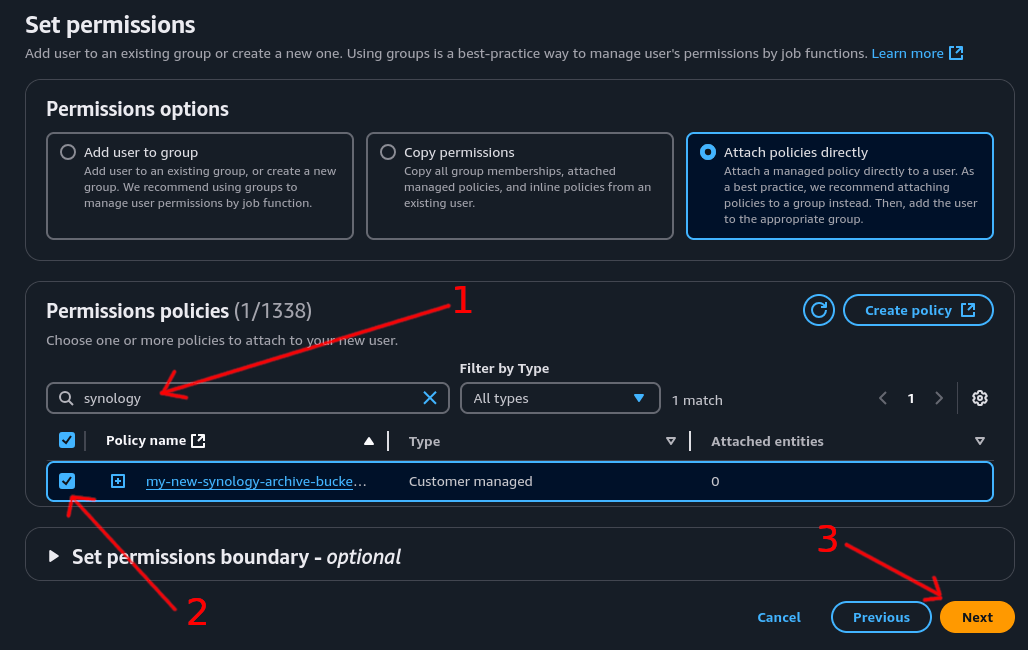
Step 10: Attach Policy to User⌗
- Use the search box to find your newly created policy. If it doesn’t appear, click the refresh button to update the list
- Tick the checkbox for that policy to add it to the user
- Click the “Next” button
Step 11: Review and Create User⌗
Check that all the details for the new IAM user are correct.
Click “Create user” to create the new IAM user.

Create Access Key⌗
Now that the IAM user has been created, we need to create an access key so the Synology can log into that account programmatically.
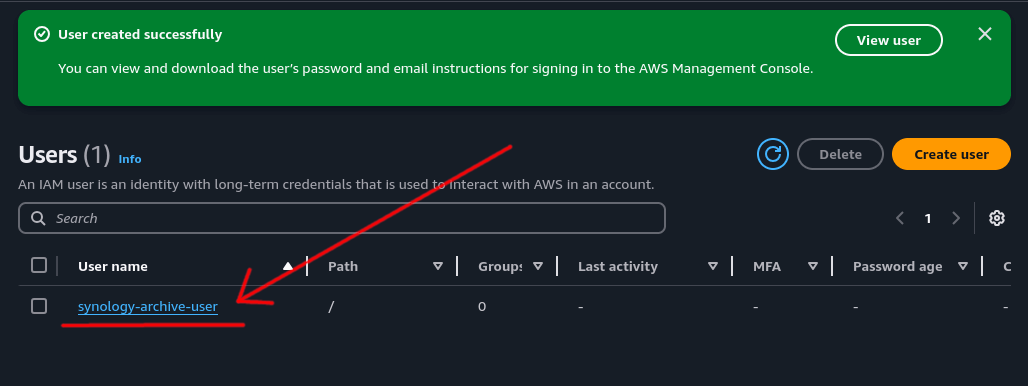
Step 1: Access User Details⌗
Start by clicking on the IAM user that was just created.
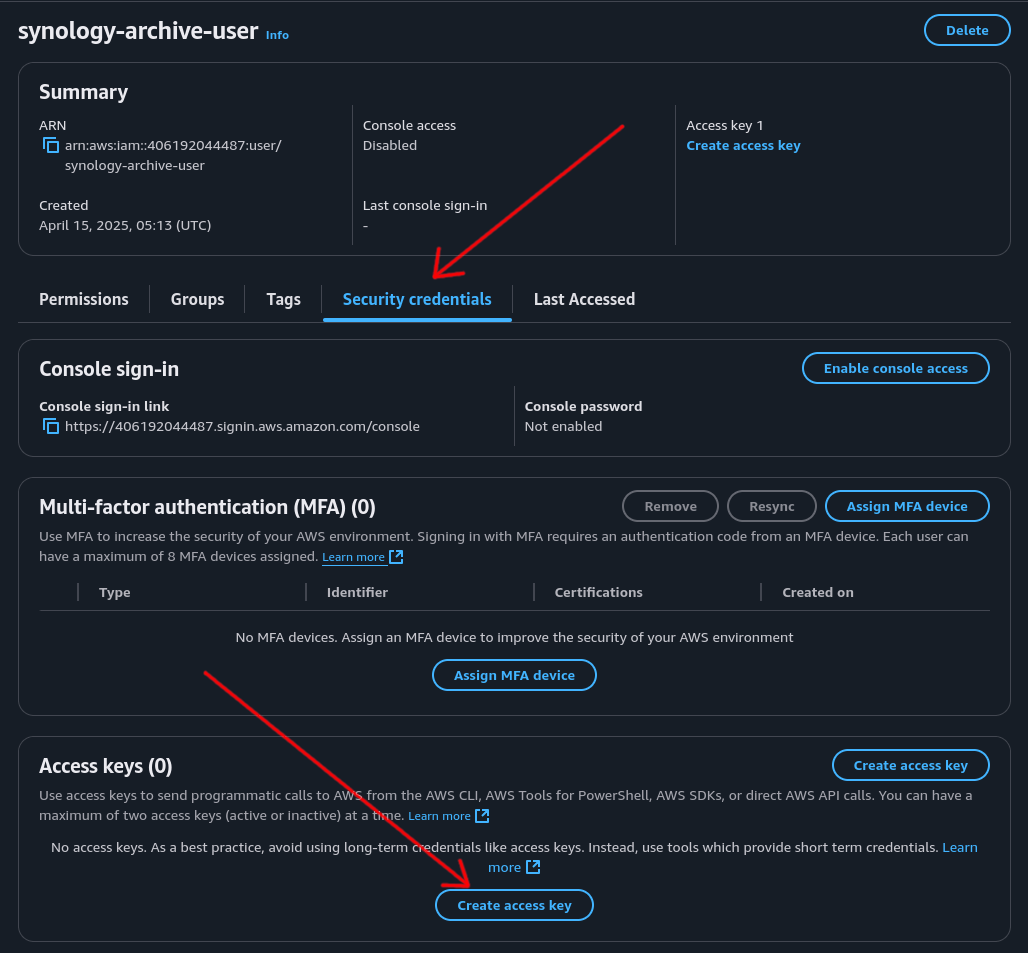
Step 2: Create Access Key⌗
- Click on the “Security credentials” tab
- Scroll down to the “Access keys” section and click the “Create access key” button
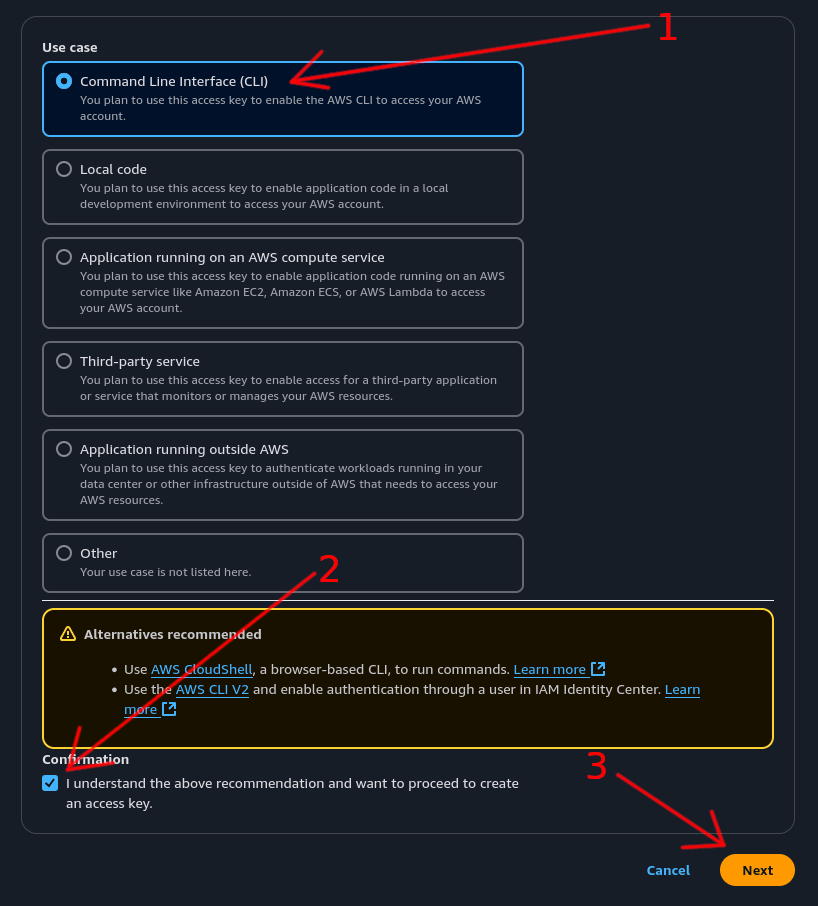
Step 3: Configure Access Key⌗
- Select the “Command Line Interface (CLI)” option
- Tick the confirmation checkbox
- Click the “Next” button
Step 4: Add Tags (Optional)⌗
You can optionally add tags for this key for better organization.
Click the “Create access key” button.

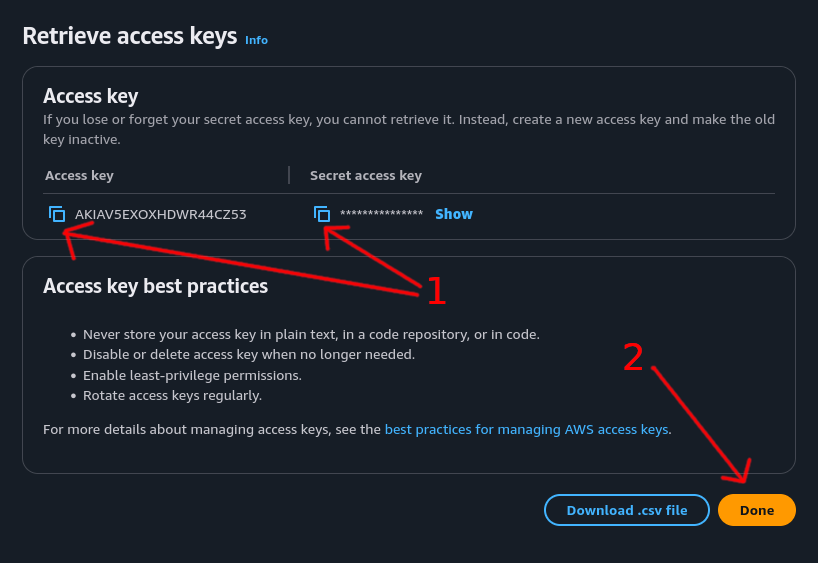
Step 5: Save Credentials⌗
Now that the access key has been created:
- Important: Copy both the
Access keyandSecret access keyand store them somewhere secure like a password manager - Click “Done”
Critical: Once you close this page, you will not be able to retrieve the secret access key again. Make sure it’s saved somewhere secure.
The AWS setup is now complete.
Configure Synology Cloud Sync to S3⌗
With the AWS configuration side of things complete, it’s time to configure your Synology NAS to sync data to the cloud.
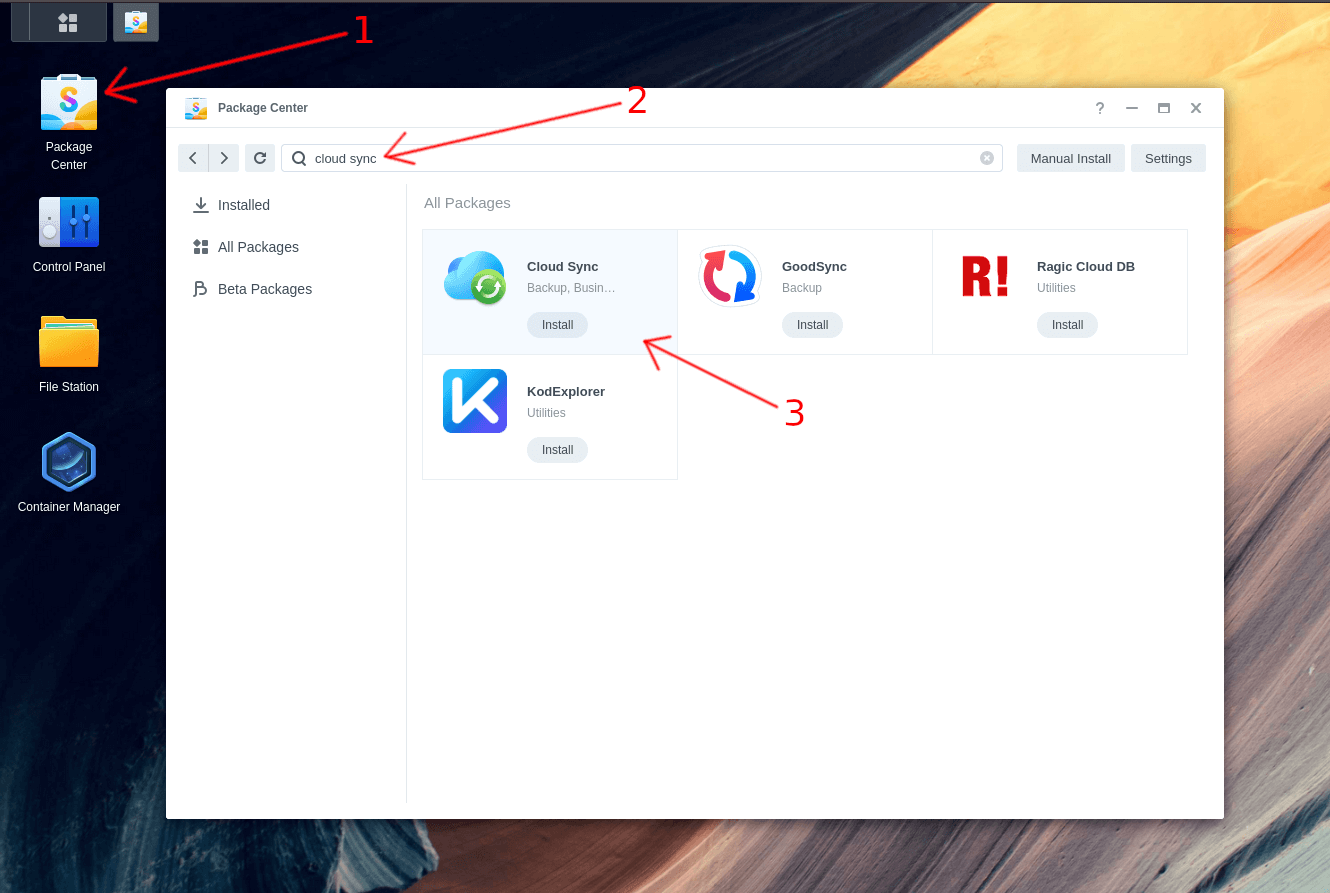
Step 1: Install Cloud Sync⌗
First, we need to install the Cloud Sync package.
- Open the Package Center on your Synology DSM
- Search for “cloud sync”
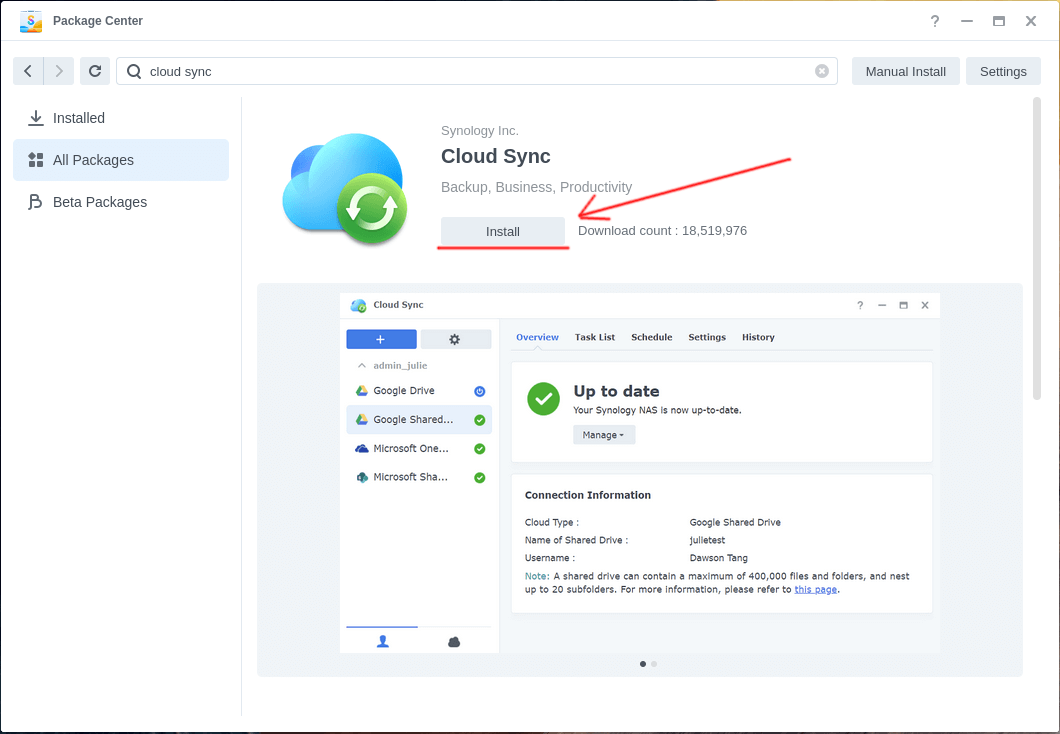
- Click the “Install” button
Click “Install” to confirm the installation.
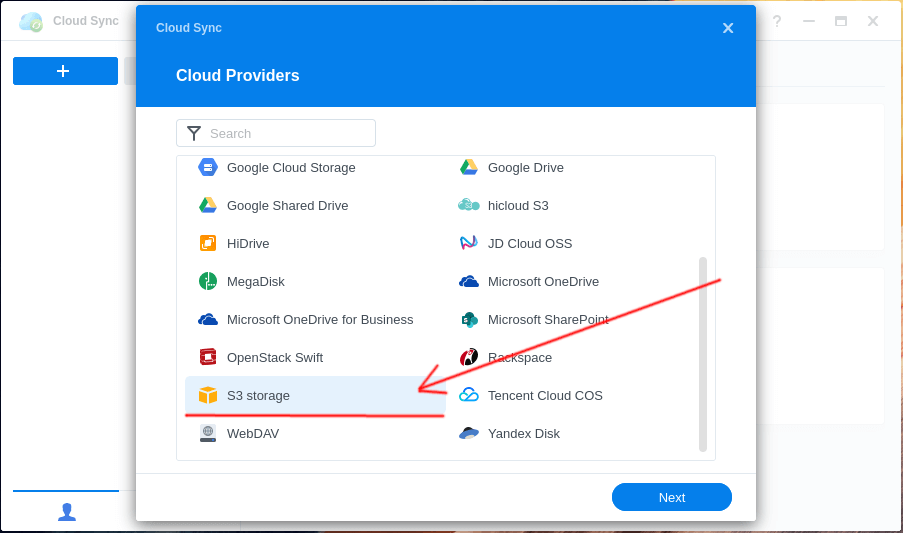
Step 2: Configure S3 Connection⌗
Launch Cloud Sync and select S3 Storage. This works with any S3-compatible storage service like Wasabi.
Step 3: Enter AWS Credentials⌗
Enter the access key and secret access key we created earlier.
If you’ve lost your access key, you’ll need to create a new one since they cannot be recovered.
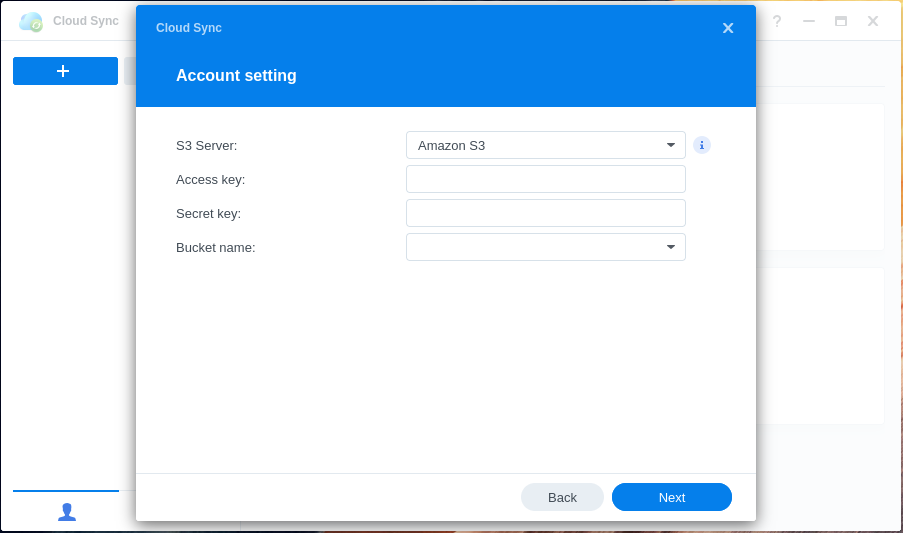
Step 4: Select Bucket⌗
If the credentials are correct, you should be able to select your S3 bucket from the Bucket name dropdown menu.

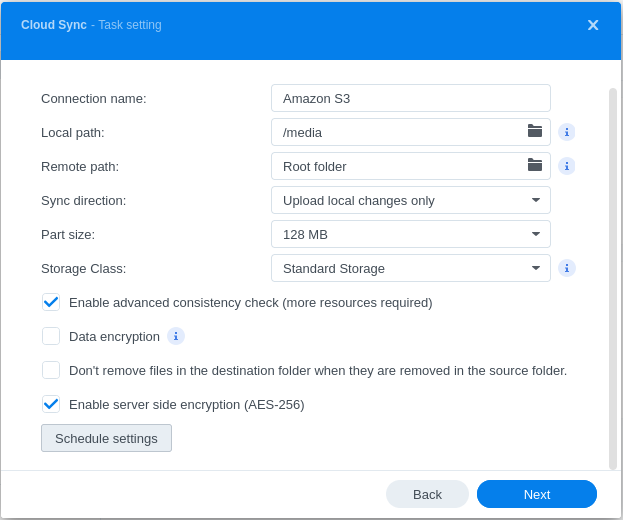
Step 5: Configure Sync Settings⌗
Configure the following settings:
- Connection name: Give it a memorable name (e.g., “S3 Archive Backup”)
- Local path: Set the location of the files you want to sync
- Remote path: Path in S3 where files will be stored. Select “Root folder” for the top of the bucket, or specify a subfolder
- Sync direction: Select “Upload local changes only” since this is for archiving
- Part size: Leave at default (this sets the chunk size for multipart uploads)
- Storage Class: Set to “Standard Storage” since lifecycle rules we made earlier will automatically move data to Deep Archive
All other options can remain at their defaults.
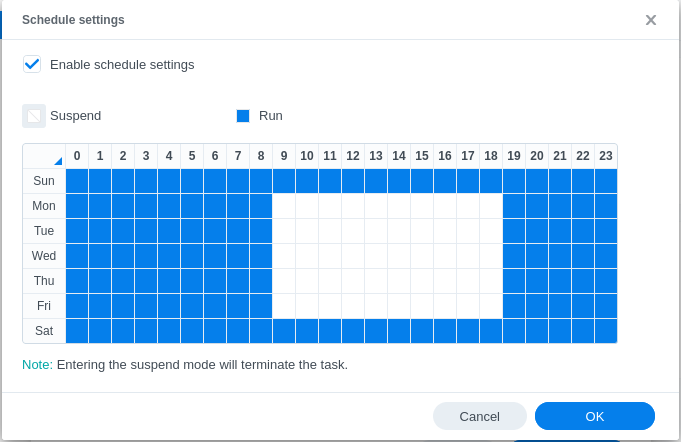
Step 6: Configure Schedule (Optional)⌗
Click Schedule settings to configure when syncing occurs.

Optional: Set a schedule so it doesn’t consume bandwidth during business hours.
Step 7: Review and Complete⌗
Click Next to continue.
Perform a final review to ensure all settings are correct, then click Done.
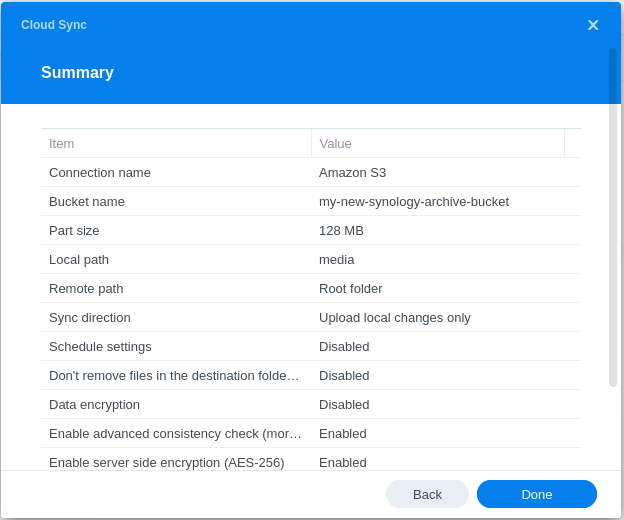
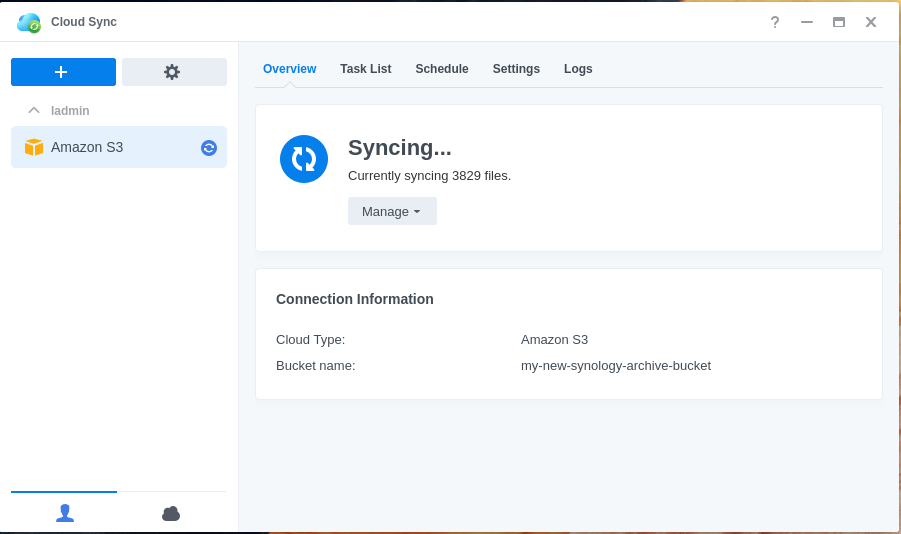
If configured correctly, you should now see your Synology NAS syncing data to your S3 bucket.
Important Considerations⌗
Cost Management⌗
- Storage costs: S3 Glacier Deep Archive is very cost-effective for storage (~$0.00099 per GB per month)
- Retrieval costs: Retrieving data from Deep Archive is expensive and slow (12+ hours for standard retrieval)
- Transition costs: There are per-request charges when moving data between storage classes
Data Recovery⌗
- Retrieval time: Standard retrieval from Glacier Deep Archive takes 12+ hours
- Bulk retrieval: Available for large amounts of data (5-12 hours)
- Expedited retrieval: Not available for Deep Archive
Best Practices⌗
- Enable S3 versioning if you’re concerned about file overwrites
- Test the sync with a small amount of data first
- Monitor AWS billing to understand costs
- Consider using S3 Intelligent Tiering for frequently accessed data
- Regularly verify that your backups are working correctly
Troubleshooting⌗
Common Issues⌗
Cannot see S3 bucket in dropdown:
- Verify AWS credentials are correct
- Check that the IAM user has the necessary permissions
- Ensure the bucket exists in the correct region
Sync fails or stops:
- Check network connectivity
- Verify sufficient space on both ends
- Review Cloud Sync logs in DSM
- Check AWS CloudTrail for API errors
High costs:
- Monitor data transfer charges
- Review lifecycle rule configuration
- Consider regional data transfer costs
Permission denied errors:
- Review IAM policy permissions
- Ensure bucket ARN is correctly specified
- Check that both bucket and object-level permissions are set
If you encounter persistent issues, check the Synology Cloud Sync logs in DSM and AWS CloudTrail for detailed error messages.